Archive for January, 2009

Hardness Conversion Chart

January 27th2009

With all of the talk lately in heat treating chromoly parts for the Rock Bug, we thought it helpful to post a hardness conversion chart detailing the relationship between hardness and tensile strength.  A few things to remember before using this guide in your next engineering project.  Tensile values provided in this chart are given as the materials tensile “yield” strength.  Because the relationship between hardness and tensile strength is inexact, actual yield strength may vary depending on the material’s properties.  Special thanks to Instron, the recognized worldwide market leader in the materials testing industry, for providing this chart to us.

Rock Bug Weekend Update for January 24, 2009

January 24th2009

Although this past week went way too fast, we’re happy to say the goals that were on the table are finished.  The main theme this week was running the electrical for the Rock Bug.  With the exception of a few finishing touches to be completed when the Rock Bug is rolling, Gerald King of Finish Line Racing has tied up all the electrical and as of yesterday is on a plane back home for some well deserved R&R.  Enjoy the video and photos below of all the finished work as of today.  Next week we will be focusing on more general assembly of the Rock Bug.  With the rest of the general assembly out of the way, we will be able to create a more precise task list for wrapping up the final pieces of the Rock Bug.

 Rock Bug Weekend Update for January 24, 2009 Rock Bug Weekend Update for January 24, 2009 Rock Bug Weekend Update for January 24, 2009 Rock Bug Weekend Update for January 24, 2009
Rock Bug Weekend Update for January 24, 2009 Rock Bug Weekend Update for January 24, 2009 Rock Bug Weekend Update for January 24, 2009 Rock Bug Weekend Update for January 24, 2009

Rock Bug Weekday Update for January 22, 2009

January 22nd2009

Consider this a “work in progress” update.  Although I planned on writing the next blog post when all the electrical work was completed, there is so much going on at the same time today I couldn’t help but post some pictures and video now.  Things are going as planned this week, with electrical being the major project to finish by the weekend.  Since our last Rock Bug update on the 19th, some of the progress has included, but is certainly not limited to, fabricating the control section for the dashboard, chromoly mounts for both the fuel cell and battery, intake routing for the Scat V4, and a custom chromoly brake pedal.  Enjoy the pictures and video here, but don’t forget there is more video at SpidertraxTV on YouTube and more photos in the Rock Bug Set on Flickr.

Rock Bug Weekday Update for January 22, 2009 by Spidertrax Rock Bug Weekday Update for January 22, 2009 by Spidertrax Rock Bug Weekday Update for January 22, 2009 by Spidertrax Rock Bug Weekday Update for January 22, 2009 by Spidertrax  Rock Bug Weekday Update for January 22, 2009 by Spidertrax Rock Bug Weekday Update for January 22, 2009 by Spidertrax
Rock Bug Weekday Update for January 22, 2009 by Spidertrax Rock Bug Weekday Update for January 22, 2009 by Spidertrax Rock Bug Weekday Update for January 22, 2009 by Spidertrax Rock Bug Weekday Update for January 22, 2009 by Spidertrax Rock Bug Weekday Update for January 22, 2009 by Spidertrax Rock Bug Weekday Update for January 22, 2009 by Spidertrax Rock Bug Weekday Update for January 22, 2009 by Spidertrax
Rock Bug Weekday Update for January 22, 2009 by Spidertrax Rock Bug Weekday Update for January 22, 2009 by Spidertrax Rock Bug Weekday Update for January 22, 2009 by Spidertrax Rock Bug Weekday Update for January 22, 2009 by Spidertrax  Rock Bug Weekday Update for January 22, 2009 by Spidertrax Rock Bug Weekday Update for January 22, 2009 by Spidertrax

Rock Bug Weekday Update for January 19, 2009

January 19th2009

So no time is wasted, Tracy picked up the now fully assembled Scat V4 motor from Powerhouse Motorsports and drove it all the way back to our shop in Longmont, CO.   The underlying theme this week is having everything fabricated and installed so all necessary electrical work can be completed.  Today, Tracy is flying in his good friend Gerald King of Finish Line Racing to handle just about all the electrical work on the Rock Bug.  Finish Line Racing, which can be reached at (602) 576-8332,  specializes in electrical work for all types of performance vehicles all the way up to Trophy Trucks and has worked with guys like the Gieser Brothers & Dunebuggy.com.  In order for Gerald to do his job, we will be busy supplying him with everything necessary for electrical such as fabricating and installing the Rock Bug’s dashboard, battery, fuel cell, Scat V4 accessories, and anything else for that matter that has wires running to it.  We had a great opportunity weighing both the chassis and fully assembled Scat V4 motor during the assembly.  As of today, the chassis weighs in just under 230 lbs and the Scat V4 motor weighs in just at 221 lbs.  The Scat V4 is projected to produce about 300 HP, so the power to weight ratio as it stands should serve the Rock Bug well.

Rock Bug Weekday Update for January 19, 2009 Rock Bug Weekday Update for January 19, 2009 Rock Bug Weekday Update for January 19, 2009 Rock Bug Weekday Update for January 19, 2009 Rock Bug Weekday Update for January 19, 2009 Rock Bug Weekday Update for January 19, 2009 Rock Bug Weekday Update for January 19, 2009

Heat Treating a Spider 9 Housing

January 14th2009

In today’s article, we’re going to step back from all the pretty eye candy.  Posts like A Rolling Rock Bug and Scat V4 Bling are both fun to write and to look at, but we have a great opportunity to throw something a little different into the mix and we weren’t going to pass it up.  One of the new concepts for the Rock Bug is a lightweight 4130 chromoly Spider 9 housing with a finished weight just at 80 lbs.  What makes this new concept unique is our plan to fully heat treat the entire housing after all axle welding is complete.  So sit back and relax as we walk you through every step, from start to finish, of heat treating a 4130 chromoly Spider 9 housing.

Step 1: Finding a Heat Treater

There are many heat treaters in the market, but not all heat treaters are the same.  A wide variety of factors come into play when choosing the right heat treater such as expertise, services offered, and furnace capacity. All of these factors are critical for the Rock Bug’s Spider 9 housing, but the issue of capacity is especially important.  Finding a heat treater that has a large enough furnace to work with a fully welded axle housing isn’t always easy.  Lucky for us, there is such a heat treater right down the road from our shop called Metal Treating & Research of Denver, CO.  How do they stack up in the area of expertise?  Heat treatment of the Spider 9 housing will be under the direction of Milford, shop foreman & production manager of Metal Treating & Research, who has been in the heat treating business since he was 16 years old.  Milford holds so much passion & knowledge in this field, I think it’s safe to say he dreams about heat treating at night.

Step 2: Fixturing

When working with a heat treater, you will need to learn a little about the processes and equipment being used on your parts.  The importance here is directly related to how the parts will be held or fixtured.  Sometimes you can get away with basic fixturing that the heat treater has on hand. However, when working with a large part like the Spider 9 housing, we have found it best to design your own custom fixturing.  Fixturing plays two important roles.  The first and obvious is it allows the heat treaters to handle or hang your part.  The second, and less obvious, is that good fixturing will keep your part straight during the heat treatment process.  If your part is not hanging straight, you run a serious risk of bending or warping.  There is clearly a lot of work in this Spider 9 housing, so we have made our own fixturing in an effort to avoid any bending or warping issues.

Step 3: Normalizing

Because the Spider 9 housing is welded, it’s safe to say internal stresses have been introduced into the material.  In this scenario, it is highly recommended to start heat treatment with normalizing, a process which stress relieves a part in turn to make it more “normal”.  If a stressed part goes straight to hardening without normalizing, there is a serious risk of material failure due to already existent material stresses.  The last thing we need is the Rock Bug’s Spider 9 housing splitting in half, so normalizing is a must and is handled like this. The 4130 chromoly Spider 9 housing will be hung vertically and dipped in a 10’ deep furnace which is held at a constant normalizing temperature of 1650°F for a calculated time of 1-1/2 hours.  While the Spider 9 housing is in the furnace, not only is time and temperature monitored, but the carbon level in the furnace atmosphere is also carefully controlled.  For this 4130 Spider 9, which has 0.30% carbon content, the atmosphere is held at 30 carbon. After 1-1/2 hours has passed, the Spider 9 housing is removed from the furnace and air cooled for about 1 hour or until the Spider 9 housing turns grey in color.

Step 4: Hardening

Although not the same as normalizing, the video below will look almost identical to the first video from Step 3.  After the Spider 9 has air cooled from normalizing, it is introduced again into the same furnace.  This time the furnace is held at a constant austenitizing temperature of 1575°F for a calculated time of 2 hours.  The furnace atmosphere is once again held at 30 carbon.

Step 5: Quenching

In an effort to “freeze” or “lock in” the hardness now achieved from the hardening in Step 4, the Spider 9 housing is removed from the furnace and quenched in a pre-heated oil bath (150°F).  In an effort to loose as little hardness as possible in the transition from furnace to oil bath, a goal of 15 seconds is set which marks the maximum allowable time the Spider 9 housing can be suspended in the air.  Once the Spider 9 housing finds its way in the oil bath, it will remain there for 5-7 minutes.

Step 6: Tempering

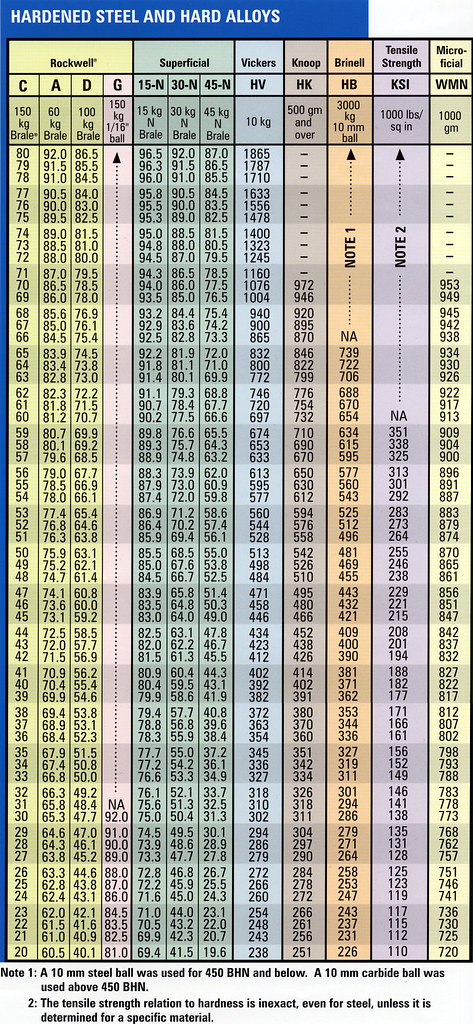
In an effort to precisely dial in the desired hardness, we move on to the final process known as Tempering.  The Spider 9 housing is moved from the quenching tank, cleaned in a hot water bath, and placed into another furnace that is held at a predetermined constant temperature of 700°F for a calculated time of 2 hours.  There is no need to monitor carbon level in this step so only temperature and time are controlled.  There is an inverse correlation with temperature and hardness when tempering: the higher the temperature the lower the hardness.  Milford makes a good point when explaining this process to me.  It’s best to ease off on the hardness a little at a time because there is no good way of adding hardness back into the part if too much is removed. Right from the quenching tank and before tempering, the Spider 9 housing is sitting at a hardness between 50-53 RC, far to high for our application.  There is a delicate balance with 4130 in achieving a well blended mixture of strength and ductility and we decided on 34-36 RC in an effort to balance this need.  At 34-36 RC, the tensile strength of the 4130 Spider 9 housing will now sit at approximately 156,000 psi.  Comparing this to the non-heat treated 4130 Spider 9 housing with tensile strength of 63,100 psi, we have strengthened the entire housing with heat treating by almost 2-1/2 times!

Well there you have it, a walk through in heat treating a Spider 9 housing.  Hope you enjoyed this entry to the Rock Bug series.  There is plenty more on the way so we look forward in seeing you back here soon.